
Theodore Lowe, Ap #867-859
Sit Rd, Azusa New York
Find us here
3 Creative Ways to Use the Remove Tool in Photoshop
Photoshop's Remove Tool is a powerful feature that simplifies the editing process. It allows users to eliminate distractions and make precise changes to images. Whether you're a professional designer or a hobbyist, mastering this tool can significantly improve your work.
By removing unnecessary elements, you can create cleaner, more focused visuals. Changing backgrounds is another creative use, enabling seamless integration of subjects into new environments. Lastly, refining portraits by removing blemishes or imperfections ensures polished results. These creative uses of the Remove Tool can elevate your Photoshop skills and produce stunning, professional-quality images.
The three creative uses of Remove tool are following.
1.Enhancing Portraits
Photoshop's Remove Tool offers amazing features for enhancing portraits. You can transform ordinary photos into stunning portraits effortlessly. Below, we explore three creative ways to use this tool to enhance your portraits.
Removing Blemishes
The Remove Tool is perfect for getting rid of blemishes. It works like a magic wand. Simply select the blemish and the tool will remove it. This helps in creating a clear and smooth skin appearance.
|
Steps |
Action |
|---|---|
|
Step 1 |
Select the Remove Tool |
|
Step 2 |
Click on the blemish |
|
Step 3 |
Watch the blemish vanish |
Smoothing Skin
Using the Remove Tool, you can also smooth the skin. This makes the portrait look professional. The tool helps in blending skin tones and textures seamlessly. Just select the areas with uneven skin and apply the tool.
-
Select the Remove Tool
-
Highlight uneven skin areas
-
Apply the tool to smooth the skin
The result is a portrait with flawless skin. Your subject will look their best, and the photo will appear more polished.
2.Creating Seamless Backgrounds
Creating seamless backgrounds in Photoshop can be fun and easy. The Remove Tool is perfect for this task. This tool helps you remove distractions and blend textures. Let's explore three creative ways to use it.
Removing Unwanted Objects
Unwanted objects can ruin a photo's background. Use the Remove Tool to eliminate them. This tool helps you maintain a clean and smooth background.
-
Select the Remove Tool from the toolbar.
-
Click on the unwanted object.
-
Photoshop will automatically fill in the gap.
Repeat the steps until your background is seamless. This method is quick and efficient. Your photos will look professional.
Blending Textures
Blending textures can create a unique background. The Remove Tool can help with this. It ensures textures blend naturally.
-
Choose the textures you want to blend.
-
Select the Remove Tool.
-
Click on the edges where textures meet.
Photoshop will smooth out the transitions. This creates a seamless look. Experiment with different textures for unique results.
Using these techniques, your backgrounds will look amazing. The Remove Tool is a powerful feature. Try it out and see the difference it makes.
3.Perfecting Product Photos
Product photos are vital for online sales. They must look perfect. The Remove Tool in Photoshop can help. This tool makes your images shine. Improve your product photos with these creative ways.
Eliminating Distractions
A clean background is key for product photos. Remove unwanted objects with the Remove Tool. It helps make your product the focus. Here are steps to eliminate distractions:
-
Open your image in Photoshop.
-
Select the Remove Tool from the toolbar.
-
Click on the unwanted object.
-
Watch it disappear and your photo improve.
Removing distractions draws attention to the product. It keeps the viewer's focus on what matters.
Highlighting Key Features
Showcase the best parts of your product. Use the Remove Tool to highlight key features. This makes them stand out more. Follow these steps:
-
Identify the key feature you want to highlight.
-
Remove surrounding clutter with the Remove Tool.
-
Adjust the brightness and contrast to enhance the feature.
-
Use the Zoom Tool to check your work.
Highlighting key features can increase sales. It shows customers the best parts of your product.
Advanced Techniques
Photoshop's Remove Tool is more than just a simple eraser. It offers powerful ways to enhance and manipulate images. By mastering advanced techniques, you can take your editing skills to the next level. Below, we explore three creative ways to use the Remove Tool combined with other powerful features in Photoshop.
Combining With Other Tools
To create stunning images, combine the Remove Tool with other Photoshop tools. For example, use the Clone Stamp Tool to replicate textures. After using the Remove Tool, blend the edges seamlessly with the Clone Stamp.
Another excellent combination is with the Healing Brush Tool. Remove unwanted elements and then smooth out any rough patches using the Healing Brush.
-
Clone Stamp Tool: Perfect for replicating textures.
-
Healing Brush Tool: Smooths out rough patches after removal.
Layer Mask Integration
Layer masks are essential for non-destructive editing. Use the Remove Tool in tandem with layer masks to achieve precise edits. Create a layer mask and apply the Remove Tool to the masked area. This technique allows you to refine the image without altering the original layer.
For instance, remove an object and then use the Brush Tool on the mask. This reveals or hides parts of the layer for detailed adjustments.
-
Create a layer mask on the target layer.
-
Use the Remove Tool on the masked area.
-
Refine with the Brush Tool for precise control.
Using Blending Modes
Blending modes can add another level of creativity. After using the Remove Tool, experiment with different blending modes to achieve unique effects. For instance, the Soft Light mode can create subtle transitions, while the Overlay mode adds contrast.
Follow these steps to use blending modes effectively:
-
Remove the unwanted element.
-
Duplicate the layer and apply a blending mode.
-
Adjust opacity for the desired effect.
|
Blending Mode |
Effect |
|---|---|
|
Soft Light |
Creates subtle transitions. |
|
Overlay |
Adds contrast to the image. |
These advanced techniques can make your edits more professional. Experiment and see what works best for your projects.
Conclusion
Mastering the Remove Tool in Photoshop opens up endless creative possibilities. Whether editing photos or creating unique designs, this tool is invaluable. Experiment with these techniques to enhance your projects. With practice, you’ll find new ways to elevate your work.
Related blog posts
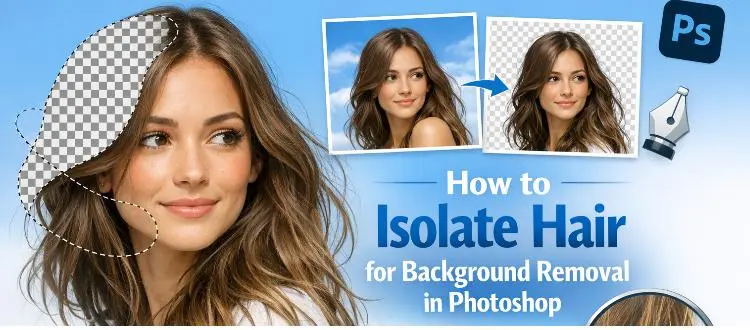
How to Isolate Hair for Background Removal in Photoshop
Are you tired of spending hours trying to perfectly isolate hair from a background in Photoshop, only to end up with messy, unnatural edges? You're not alone.
Clipping Path Associate has empowered businesses globally for over 12 years. A passionate team is dedicated to providing meticulous photo editing services. Expertise is offered in a range of areas, from precise clipping paths to flawless image retouching. The company offers straightforward yet impactful solutions tailored for photographers, e-commerce enterprises, advertising agencies, web design firms, magazine publishers, printing companies, and more.
We Accept : 